

A faded photograph of soldiers at Gettysburg slowly comes to life as the camera gently drifts across their faces, zooming in to reveal the subtle details of their weathered expressions. This haunting moment from Ken Burns' landmark documentary "The Civil War" transformed how we experience historical photographs, creating an emotional connection that static images alone couldn't achieve.
What appeared to be simple camera movements across still photographs became one of the most influential techniques in visual storytelling. Today, this effect, known as the Ken Burns effect, has transcended its documentary origins to become a powerful tool in everything from Hollywood blockbusters to viral TikTok videos.
In this comprehensive guide, we will explore the technical aspects and creative principles of the Ken Burns effect selling through basic to advanced applications, understanding why certain techniques work better than others, and how you can use this knowledge to enhance your own visual storytelling.
What is the Ken Burns?
Before diving into complex animations and technical implementations, it is crucial to understand what exactly the Ken Burns effect is and how it fundamentally works.
At its core, the Ken Burns effect is a digital video editing technique that combines three fundamental camera movements: Panning (Horizontal or Vertical movement), Zooming (Moving closer to or farther from the subject), and occasionally Rotation. These movements are applied to still photographs to create a sense of motion and dynamic storytelling.
But reducing it to just camera movements would be like describing a symphony as merely organized noise. The essence of the Ken Burns effect lies in how these movements are synced to create emotional resonance and narrative depth.
Core components of the Ken Burns effect
When you watch a masterfully executed Ken Burns effect, what appears as a simple movement across a photograph is a carefully crafted combination of three fundamental components. Let's understand what these elements are and how they work together, which is crucial for creating compelling visual narratives.
1. The art of Panning
Panning is a deliberate horizontal or vertical movement across an image that reveals its story progressively. The power of panning lies in its ability to guide viewer attention.
When Ken Burns documented the American Civil War, he often began with a wide shot of a battlefield, then slowly panned across the scene, allowing viewers to absorb the magnitude of the conflict.
This technique works because it mirrors our natural way of exploring vast scenes, creating a more immersive experience.
The direction of your pan also matters significantly. In Western cultures, left-to-right movement feels natural and progressive, making it ideal for introducing new information.
Conversely, right-to-left panning often creates tension or suggests returning to previous events.
Vertical panning, meanwhile, can create powerful emotional effects. Here, upward movements tend to feel aspirational, while downward pans can evoke reflection or solemnity.
2. Mastering the Zoom
The zoom component of the Ken Burns effect is perhaps its most emotionally powerful element.
When you zoom in on a photograph, you create intimacy and focus.
Consider how documentarians often start with a group photograph and slowly zoom in on a single face. This movement creates an emotional connection with that individual, making their story more personal and impactful.

On the other hand, zooming out provides context and perspective.
Starting tight on detail and pulling back to reveal the larger scene can create powerful moments of revelation.
This technique was masterfully used in "Citizen Kane," where what appears to be a close-up of Kane's face gradually zooms out to reveal it is actually a massive campaign poster, symbolizing his larger-than-life public persona.
3. The Subtle Power of Rotation
While less commonly used than panning and zooming, rotation adds a dynamic element that can dramatically enhance your visual storytelling.
Subtle rotation (usually between 5-15 degrees) can add energy to otherwise straight movements. It's particularly effective when telling stories of change or transformation.
However, rotation should be used sparingly. Too much rotation can disorient viewers from your narrative purpose.
Understanding the Implementation Framework
Before diving into specific steps, it's crucial to understand that implementing the Ken Burns effect requires more critical skills. It is a deliberate process that combines technical precision with creative storytelling. The Success lies in careful planning, systematic execution, and meticulous attention to detail.
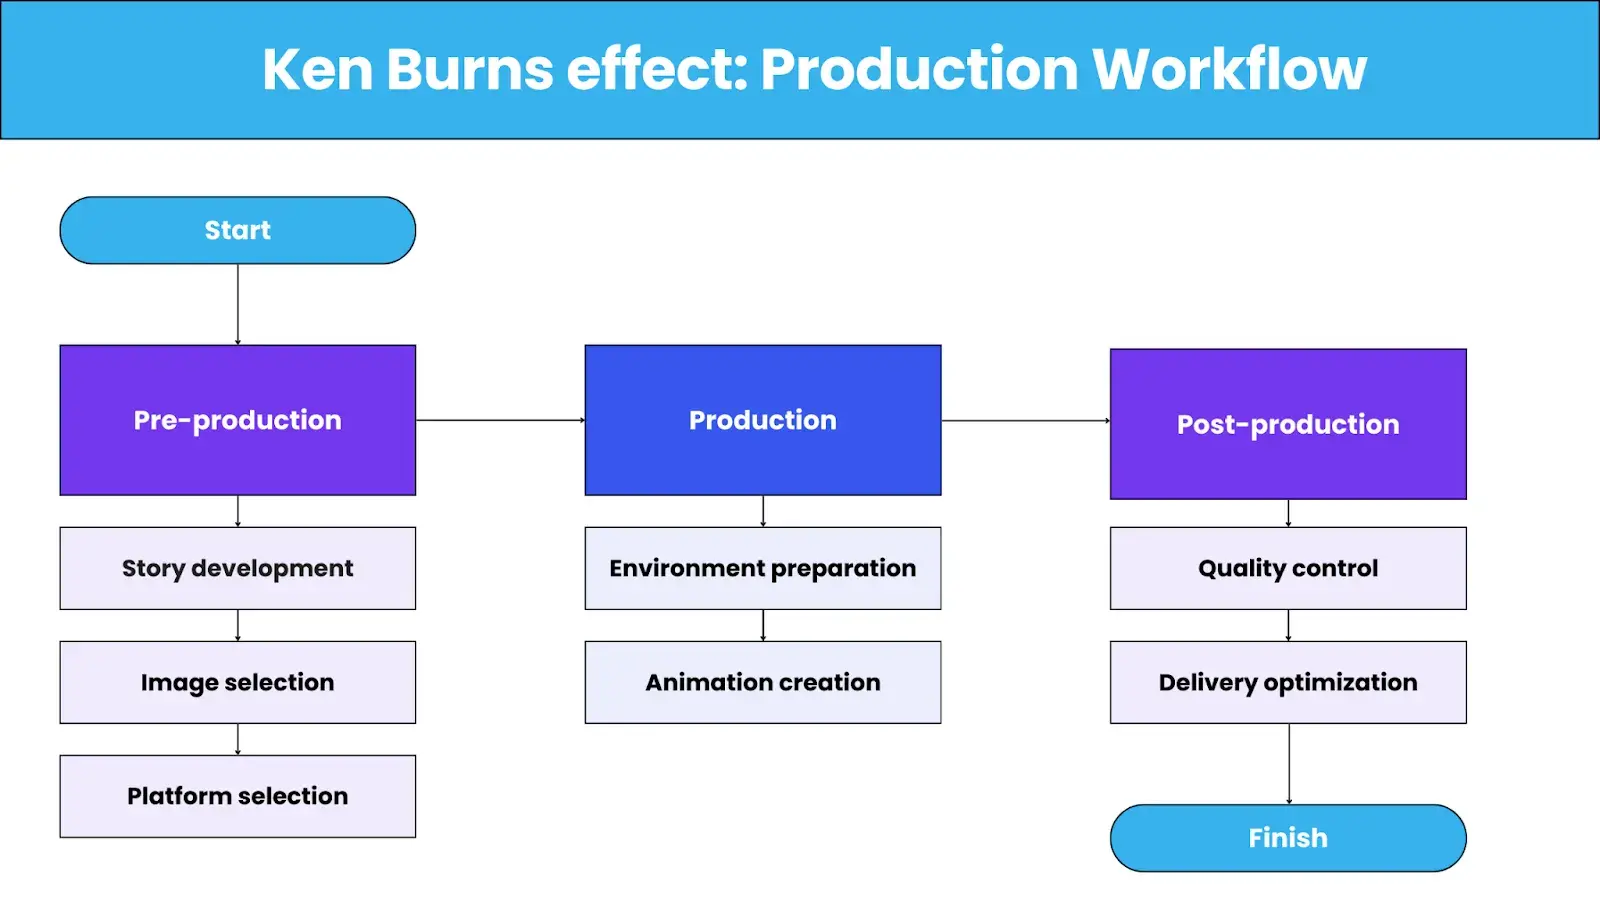
Phase 1: Pre-Production Planning
1. Story Growth
The foundation of any effective Ken Burns animation begins with story development. It is the cornerstone of pre-production that determines how effectively your Ken Burns animation will engage viewers and convey its intended message. Without proper story development, even technically perfect animations risk becoming mere mechanical movements across an image.
You can begin with comprehensive image analysis by identifying the primary subject and its position within the frame. Document supporting visual elements that contribute to the narrative context. Note specific details that carry emotional or historical significance within the composition.
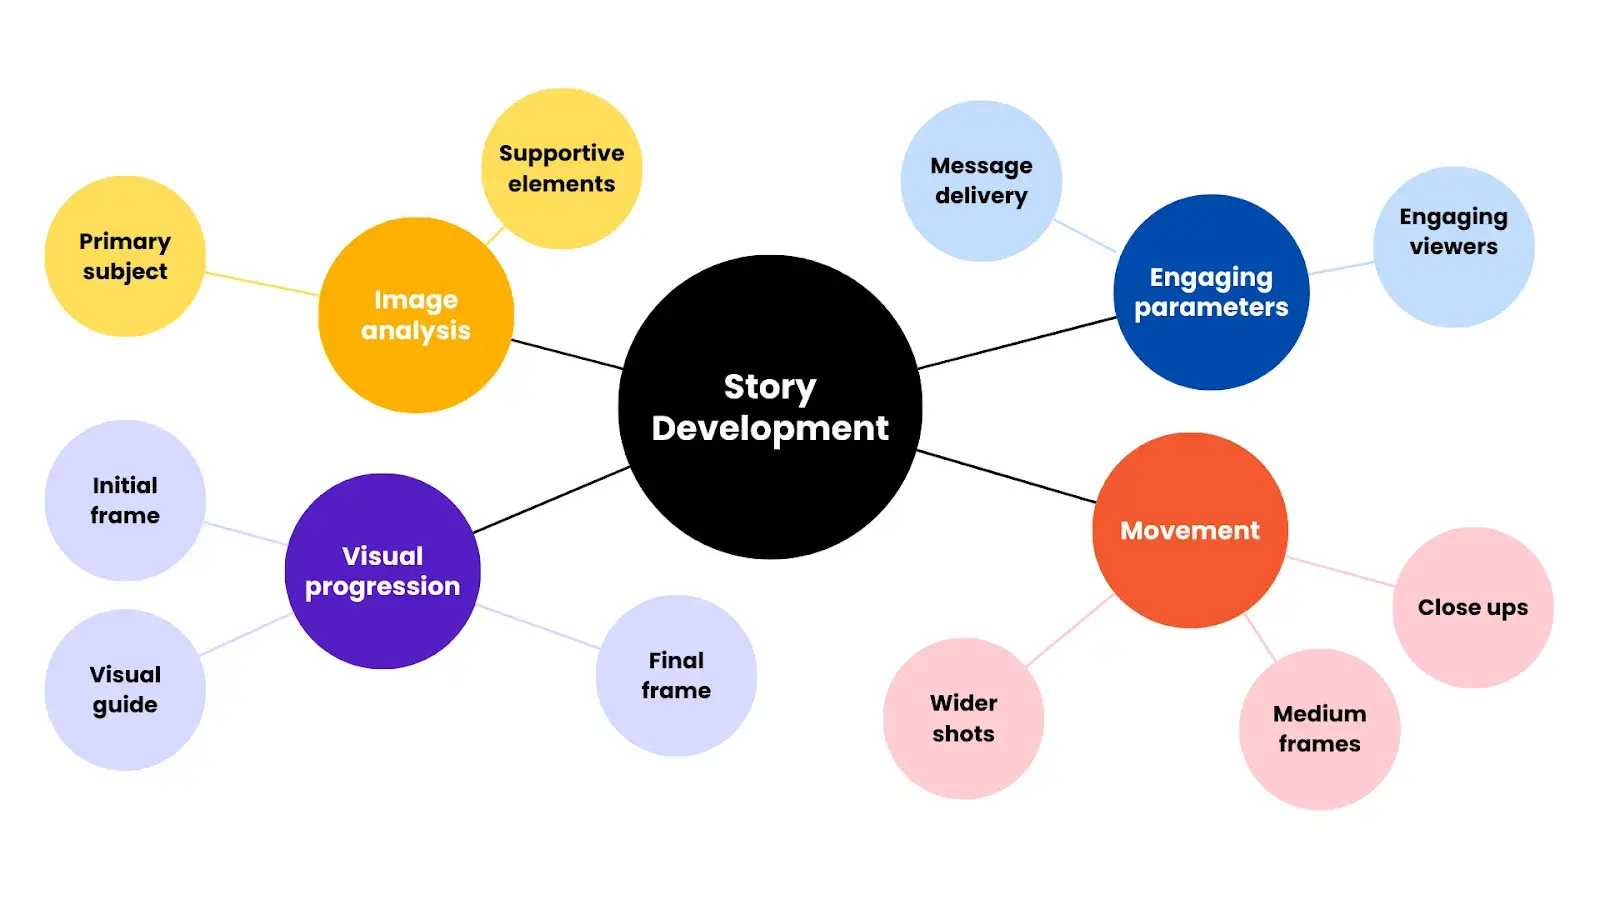
Develop a structured visual progression that guides viewers through the image. Remember, the initial frame must establish a clear context for the viewer, while the final frame should culminate in a significant visual element that reinforces the objective of your story.
Implementation of these movements also demands precise technical execution. Wide establishing shots provide the necessary context and orientation, Medium-frame transitions reveal interconnected elements and build narrative depth, while strategic Close-ups emphasize crucial details of the story.
2. Choosing the perfect image
Resolution of image
When selecting images, resolution becomes your first consideration; you'll want at least twice your final output resolution.
For instance, if you are creating an HD project, working with 4K images (3840x2160) gives you ample room to zoom and pan without losing quality.
Some creators even opt for higher resolutions, essentially future-proofing their work for different delivery formats.
Composition of image
The composition of your image plays an equally vital role. The best images for Ken Burns often feature clear focal points with generous surrounding space.
This extra space acts as your staging area, allowing smooth, natural-looking movements across the frame.
Following the rule of thirds when planning your start and end positions creates more dynamic and engaging animations. However, be cautious with images that place important details near the edges; these can complicate your movement options and might get cropped during animation.
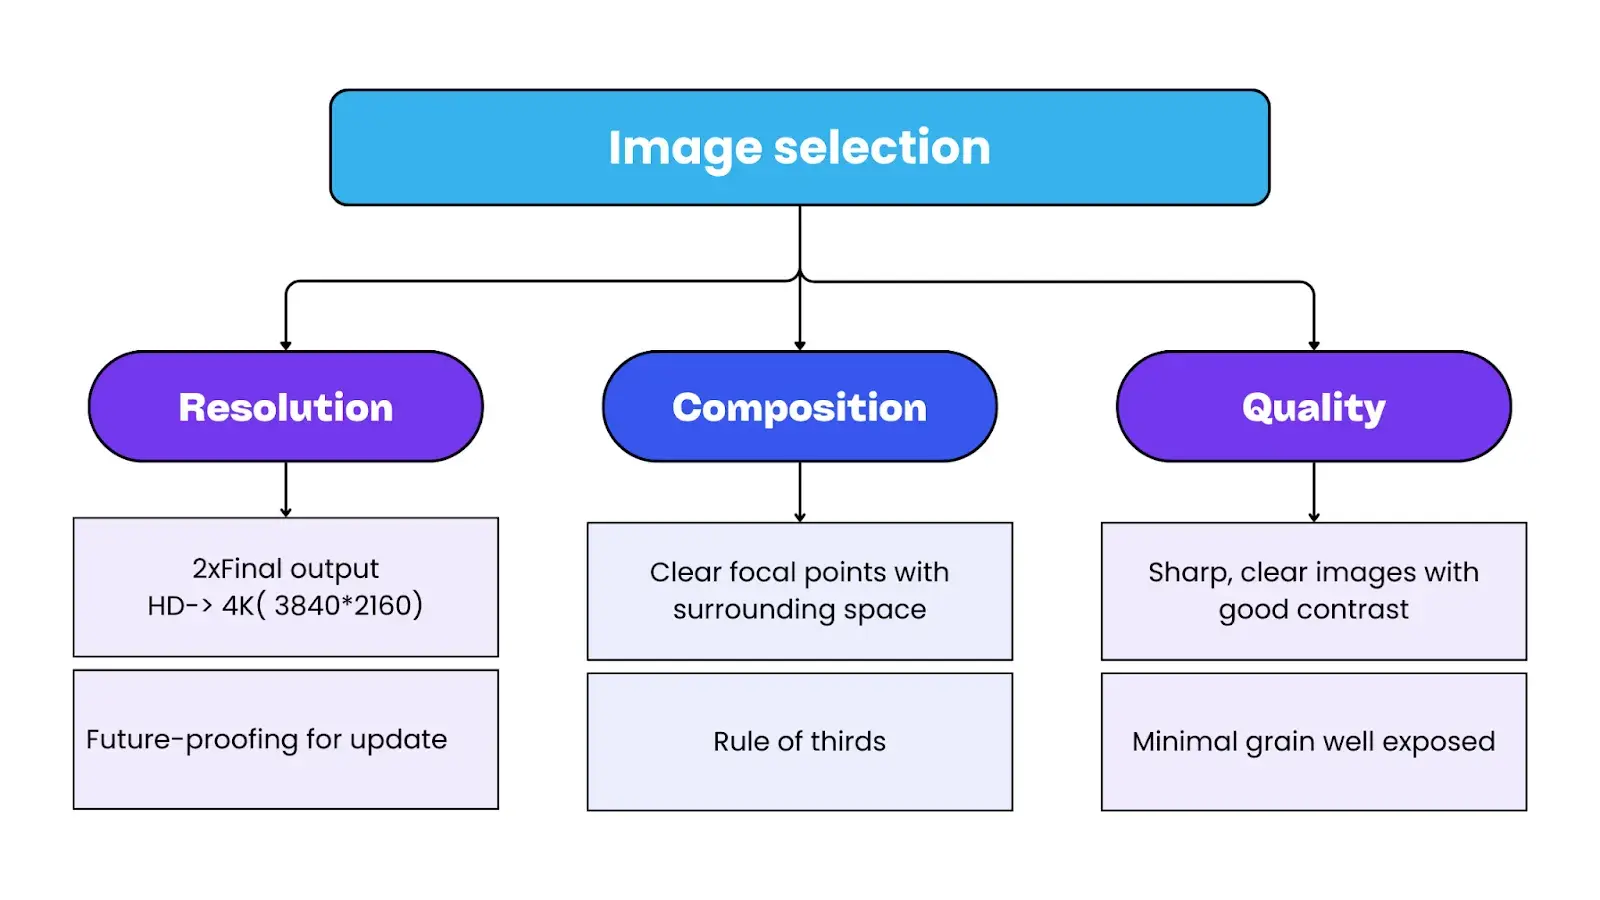
Image quality
This becomes particularly noticeable when applying motion. Sharp, clear images with good contrast and balanced colors work best.
Even minor imperfections like grain become more apparent when the image is in motion, so choosing clean, well-exposed images saves you from potential headaches later.
3. Selecting the Right Platform
Understanding platform requirements is crucial for ensuring the optimal delivery of Ken Burns's animations across different media channels. Each platform has distinct technical specifications that directly impact visual quality and viewer experience.
Delivery format specifications
The file format you choose determines the final quality and file size of your animation. Just as you might choose between JPEG or PNG for photos, video platforms have preferred formats like MP4 or MOV. Select a format that maintains good visual quality while meeting the platform's specific requirements. For example, YouTube works well with MP4 files using H.264 compression, while broadcast TV might require ProRes or other professional formats.
Resolution constraints
Resolution refers to how many pixels your video contains, affecting clarity and detail. Higher resolutions look sharper but create larger files that require more processing power and bandwidth.
Consider both where your animation will be viewed (phones, computers, TVs) and practical limitations like internet speed. A good rule is to match or exceed the platform's standard resolution - 1080p for most online platforms 4K for premium services.
Aspect ratio requirements
Aspect ratio is simply the shape of your video frame. Getting this wrong can result in your animation being cropped or displayed with black bars. Modern platforms use 16:9 (horizontal rectangle) for standard viewing. Social media adds new requirements - Instagram Stories and TikTok use 9:16 (vertical rectangle). Plan your Ken Burns movements to work within the correct shape for your destination platform.
Duration guidelines influence pacing and movement design. While broadcast content may accommodate longer sequences, social media platforms often require shorter, more dynamic animations to maintain viewer engagement.
Phase 2: Production Setup
1. Environment Preparation
Creating the right working environment is crucial for efficient implementation. For software configuration, ensure your project settings are aligned with delivery requirements. Set appropriate frame rates that match your output needs. Configure color space settings to match your final output requirements. Allocate proper scratch disk space to prevent performance issues during production.
Organize your workspace with a logical folder structure for all assets. Implement a version control system to track changes and allow for revisions. Establish backup protocols to prevent data loss. Make reference material easily accessible to maintain consistency throughout the project.
2. Animation Creation
Basic Movement Implementation
The core animation process follows a systematic approach. Begin with your establishing shot as the initial position. This should be a stable, well-composed frame that introduces your subject.
Take time to set your initial scale so your subject fits appropriately within the frame. Position key elements to create a balanced composition. Establish safe margins to prevent important elements from being cut off.
Configure motion blur settings to match your desired aesthetic. Develop your movement pattern with intention when designing your animation. Create primary keyframes at major story points to establish the narrative flow.
Apply appropriate easing curves to create natural-feeling movements. Test movement timing to ensure proper pacing. Verify composition throughout the sequence to maintain visual appeal.
3. Advanced Movement Refinement
Once basic movements are established, focus on refinement. For timing adjustments, fine-tune keyframe spacing to create the perfect rhythm. Adjust velocity curves to emphasize important moments.
Synchronize movements with narrative beats to reinforce your story. Test different playback speeds to find the optimal pace.
You can enhance quality by strategically applying motion blur to create a more cinematic feel. Implement frame blending for smoother transitions between frames. Add subtle organic movement to prevent static-looking animation. Refine edge treatment to ensure clean, professional results.
Phase 3: Post-Production
1. Quality Control
Systematic quality control ensures professional results. For visual quality, check full-resolution previews to spot any issues that might not be visible in smaller previews. Verify edge preservation to ensure elements remain sharp where needed. Test on multiple displays to ensure consistency across different viewing environments. Evaluate color accuracy to maintain your intended look.
Assess movement quality by checking motion smoothness throughout the animation. Verify timing consistency across all sequences. Check for unwanted artifacts that might distract viewers. Confirm that narrative pacing supports your storytelling goals.
2. Delivery Optimization
Different platforms require different approaches. For broadcast television, adhere to higher bitrate requirements to meet professional standards. Follow strict technical specifications provided by broadcasters. Select professional codecs that maintain quality while meeting delivery requirements. Meet all quality control standards required for broadcast.
When preparing for social media, create compressed file sizes that load quickly but maintain acceptable quality. Adapt to platform-specific aspect ratios to maximize the viewing area. Optimize for mobile playback since most social media is consumed on mobile devices. Focus on engagement-focused timing that captures attention quickly.
3. Final delivery package
Prepare your final deliverables thoroughly. Meet technical requirements by creating a master file of the highest quality for archival purposes. Develop platform-specific versions optimized for each destination. Create backup copies stored separately from working files. Provide comprehensive technical documentation for clients or team members.
Ensure quality assurance by conducting final platform testing on actual target platforms. Verify playback on different devices and browsers. Confirm technical specification compliance through measurement tools. Review all documentation for accuracy and completeness.
Advanced Animation Techniques
The true power of the Ken Burns effect emerges when you move beyond basic movements to create more sophisticated animations that serve your storytelling goals. Understanding these advanced techniques allows you to craft more engaging and emotionally resonant sequences.
1. Parallax Animation
Parallax animation adds depth to still images by creating an illusion of three-dimensional movement.
This technique involves separating an image into foreground, midground, and background layers and then animating them at different speeds. The varying movement speeds mirror how objects appear to move in real life.
When implementing parallax, the key lies in the subtle differences in movement speed. Research in visual perception shows that our brains are highly sensitive to motion parallax.
For optimal results, maintain a movement ratio where foreground elements move roughly 1.5 times faster than midground elements, and background elements move at about 0.5 times the speed of midground elements.
2. Multi-Point Keyframing
While basic Ken Burns movements typically use just start and end points, multi-point keyframing creates more complex and nuanced movements.
This technique involves setting multiple position and scale points throughout the animation's duration. The power of this approach lies in its ability to create natural-feeling progressions that maintain viewer interest.
Consider “The John Wick” finale, which masterfully employs multi-point keyframing—starting on the wounded hero, widening to reveal location, then closing on his injuries before settling on his resolute face.
Each transition between these points should be carefully timed to allow viewers to process the information being revealed.
3. Combining Zoom and Pan for Advanced Storytelling
The true power of the Ken Burns effect emerges when combining different movement types. The interplay between zooming and panning can create complex visual narratives that guide viewers through your story. Here, your goal is to blend these elements in ways that serve your story.
A common and effective combination starts with a slow zoom while panning, creating what cinematographers call a "reveal, discover, and explore" movement. Let’s understand this component with practical steps:
The Reveal, Discovery, and Journey Techniques
The Reveal starts with a tight zoom on a detail, then slowly zooms out while panning to reveal the context. Use ease-out timing to make the reveal feel natural.
The Discovery begins with a wide establishing shot, combines a gradual zoom with a subtle pan, and ends with a significant detail that adds narrative weight.
The Journey creates multi-point paths through your image, varies zoom levels at different points, and uses speed changes to emphasize different elements.
Technical Execution Tips
When combining different camera movements like zooms and pans, there is an art for making them feel cohesive and intentional.
At its core, this technique relies on understanding the relationship between multiple moving elements.
The key is to maintain a balanced ratio between your zoom and pan speeds; if one movement is too fast or slow compared to the other, it can create a jarring effect that pulls viewers out of the experience.
These movements need to work in harmony through complementary ease curves. For instance, if you zoom in while panning right, both movements might start slowly, build to a peak, and then gently ease out together.
Throughout this process, composition remains crucial. Each frame along the movement path needs to work both as a transitional moment and as a potential stopping point. This means constantly evaluating how elements enter and exit the frame, maintaining proper headroom, and ensuring your subject stays properly positioned.
A key practice is testing your movements at different playback speeds. What looks smooth at normal speed might reveal issues when slowed down or feel too sluggish when sped up. This testing helps you fine-tune the timing and ensure the movements remain cohesive regardless of playback rate.
Complex Movement Considerations
For advanced combinations, you have to keep an eye on motion design. It requires careful consideration of subtle elements that impact visual flow and user experience. Rotation angles between 1-3 degrees create natural movement without drawing attention to the animation itself. This mimics how objects naturally pivot in the physical world.
Zoom transitions work best within a constrained range of 1:1.2 to 1:1.5 ratio. This matches human visual expectations based on how we naturally approach or retreat from objects. More extreme ratios can create disorienting effects that break immersion.
Reference points serve as anchors during complex movements. By tracking key elements across frames, animations maintain spatial consistency and smooth motion paths. This prevents unwanted jumping or stuttering that could disrupt the viewing experience.
Motion blur varies significantly with speed; faster movements require more pronounced blur to appear natural. This matches how our eyes process rapid movement, where details become less distinct as velocity increases. The amount of blur should be proportional to movement speed to maintain visual authenticity.

Every movement should have a purpose, whether it is revealing crucial details, building tension, or creating emotional connections. As you experiment with these elements, always ask yourself: "What story am I telling with this movement, and how does it enhance my narrative?"
Timing and Pacing Strategies
The rhythm of your Ken Burns animations can significantly impact your story's emotional resonance and viewer engagement. Understanding how to manipulate timing and pacing is crucial for creating professional-quality results.
1. Speed Considerations for Different Contexts
Speed really depends on what you're trying to accomplish with each shot. Different scenarios call for different speeds. For example:
For establishing shots, you should use slower movements, somewhere around 10 to 15 seconds. This gives your viewers enough time to take in the scene and understand where they are.
Suppose you want to highlight specific details in a photo aim for a medium pace, about 5 to 7 seconds. It's quick enough to keep viewers engaged but slow enough that they can actually see the details you're emphasizing.
Or if you want to show something more exciting or urgent, then use faster movements, typically 3 to 5 seconds. These quick transitions create energy and a sense of urgency. They're great for dynamic sequences where you want to build momentum or excitement.
So basically, the more information viewers need to absorb, the slower you should make the movement. Just match your timing to your storytelling needs.
2. Emotional Pacing
Your movements' speed and acceleration should align with the emotional content of your story. This principle emerges from the psychology of how humans process visual and emotional information.
For example, for more contemplative moments or scenes with historical significance, you'll want slow, gradual movements that last about 10 to 15 seconds.
Those slow movements give viewers time to process both the emotional weight and the complex visual information. They work really well when you want people to reflect on what they're seeing.
For the more exciting parts of the story, you'll want quicker, more dynamic movements, typically around 5 to 7 seconds. These work better for energetic moments, transitional scenes, or when you're building tension.
And they're even better when the visual information is simpler and doesn't need as much time to process. The quicker pace keeps the energy up and moves the story forward. It's all about matching your technical choices to the emotional experience you want to create.
3. Easing and Acceleration
Sometimes, while trying to make Ken Burns's effects look more professional, you might end up with something a bit mechanical. That's because you're probably using constant movement speeds.
Natural movement rarely happens at a steady pace. It almost always involves acceleration and deceleration.
Professional animations use what we call 'easing functions'—mathematical curves that change the rate of movement over time. The most natural-feeling animations use three main types of easing.
First, there's 'ease-in,' which starts slowly and gradually accelerates from the starting point. Then 'ease-out,' which is a gentle deceleration as you approach the endpoint. And 'ease-in-out' combines both for a smooth start and finish.
Research in animation psychology shows viewers find movements with proper easing more natural and engaging because they mirror real-world physics. Objects in the real world rarely move at constant speeds.
4. Music Synchronization
When it comes to timing your Ken Burns movements to music, people find it challenging, but music synchronization is definitely important.
One key factor is tempo matching, which is aligning your movement speeds with the beats per minute of your music. It creates a subconscious connection between what people see and hear.
It's fascinating that viewers are sensitive to audio-visual synchronization even when they're not consciously aware of it. You should also ensure emotional consonance.
Another factor is ensuring emotional consonance, which means making sure your movement style matches the emotional tone of the music.
For example, dramatic swells in the music pair well with slow, sweeping movements across a landscape. More rhythmic music works better with shorter, dynamic movements.
Don't forget about sound design integration. Adding subtle sound effects can really enhance your animations—things like gentle whoosh sounds during movement changes, period-appropriate ambient sounds for historical photos, or transitional audio between scenes.
Properly synchronized audio-visual elements can improve information retention compared to visual-only presentations. It's definitely worth the extra effort.
Practical Applications of Ken Burns
The Ken Burns effect extends far beyond documentary filmmaking, finding valuable applications across various media formats and industries. Understanding these applications helps you adapt the technique for different contexts and audiences.
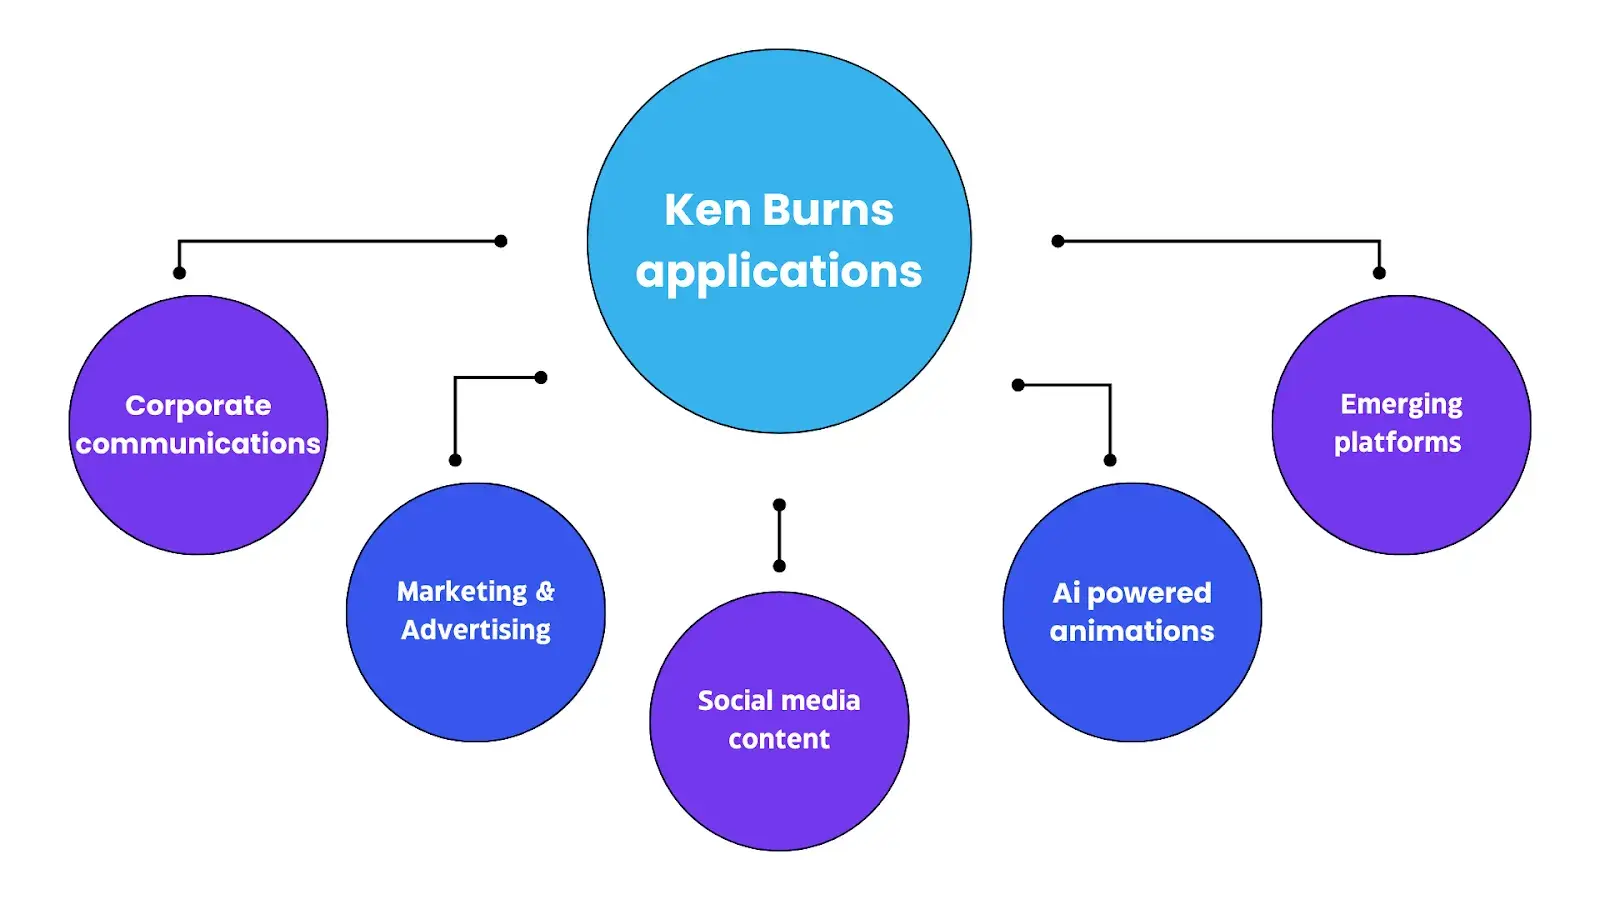
1. Corporate communications
In corporate environments, the Ken Burns effect has become invaluable by changing static presentations into engaging visual narratives. Imagine sitting through PowerPoint with static slides versus one where images subtly move and focus on key details.
Research shows that animated presentations achieve 43% better retention rates compared to static slides.
The dynamic visuals break down complex information, and the controlled pacing gives our brains time to process. Plus, it just looks more professional and credible.
2. Social Media Applications
The rise of social media has created new demands for engaging visual content, particularly in vertical formats. The Ken Burns effect has evolved to meet these challenges, with specific adaptations for different platforms.
For Instagram Stories, creators use faster movements—usually just 3-5 seconds—because viewers scroll quickly. They also adapt it for vertical viewing.
While on TikTok, you'll see the effect synchronized with music beats and quick transitions between multiple images to maintain interest.
3. Marketing and Advertising
Marketers love this technique because it creates emotional connections.
A slow zoom into a family using a product feels more emotional than a static shot. It's great for highlighting specific product features.
It keeps viewers watching longer-form content. And it gives brands a professional, high-quality look.
4. AI-Powered Animations
The exciting development is how AI creates and implements Ken Burns's effects.
New programs can analyze your images and suggest the best movement paths. They can generate multiple animation options in seconds.
They automate complex animations that would take hours manually. These AI capabilities aren't replacing human creativity but augmenting it to enhance storytelling impact.
5. Real-Time Rendering Advances
The future of Ken Burns animations is increasingly real-time, driven by improvements in processing power and rendering algorithms.
You can see previews instantly without waiting for rendering. Live streams can incorporate these movements on the fly.
Viewers can interact with the content. And the animations can adapt dynamically based on different factors.
6. Emerging Platforms and Formats
New media platforms continue to create opportunities for innovative applications of the Ken Burns effect. As media continues to evolve, this classic technique is adapting to thrive across emerging platforms.
For example, Virtual Reality now allows viewers to feel immersed in historical photographs, while Augmented Reality can overlay Ken Burns-style animations onto physical spaces.
Some interactive websites incorporate the technique to create engaging storytelling experiences that respond to user actions.
Even responsive design applications are finding ways to implement these smooth transitions across different screen sizes and devices.
What's fascinating is how these technological adaptations maintain the essence of what makes the Ken Burns effect so powerful. Despite the dramatic shift in delivery methods, the core principles—creating emotional connection through movement, revealing details gradually, and building narrative through visual pacing—remain just as effective today as when Burns first popularized the technique in his documentaries.
What next?
The Ken Burns effect remains a fundamental tool in visual storytelling, continually adapting to new technologies and creative needs. Its enduring relevance lies in its ability to bring static images to life while maintaining emotional impact and narrative clarity.
Success with the Ken Burns effect comes from understanding not just the technical aspects but also the psychological and emotional principles behind effective visual storytelling.


